
DIY Strawberry Gutter
If you want to grow some strawberries this year, but you don't have a lot of space in your garden, then give this DIY Strawberry Guttering a try - it's cheap to make too.
Servings: 1 Gutter frame
Cost: £45 / 55USD / 88AUD
Equipment
- Drill/driver or hand screwdriver
- Saw
- Tape measure
Ingredients
- 4 m Guttering any colour, deep profile
- 8 Gutter stop ends to suit
- 8 Gutter brackets to suit
- 3 m 140x22mm/6x1” timber treated, cut to two equal lengths
- 2.2 m 50x38mm/2x1.5” timber treated, cut to two equal lengths
- 24 50mm/2" exterior screws
Instructions
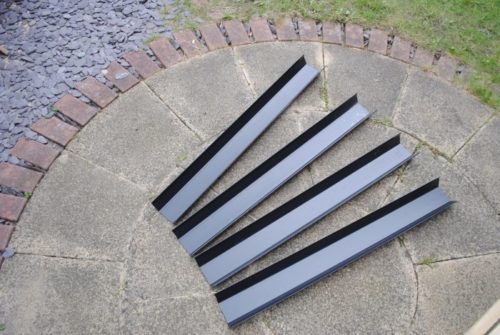
- Measure your space and using a hacksaw cut the gutter to the lengths you require (mine are 1 metre/39 inches long each).
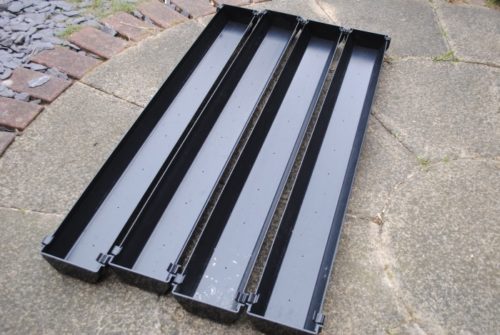
- Using a drill, make drainage holes in the base, spaced about 15cm/6 inches apart. Put the stop ends on and the gutter is ready. At this point, the brackets can be fixed to a vertical surface if you have a suitable one available and the gutter clipped into them.
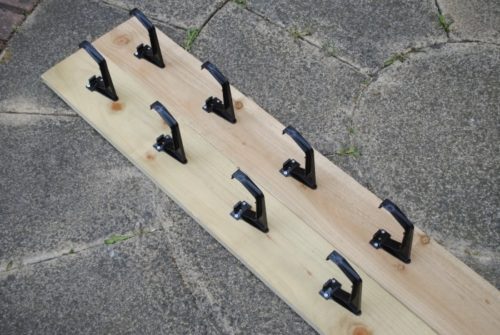
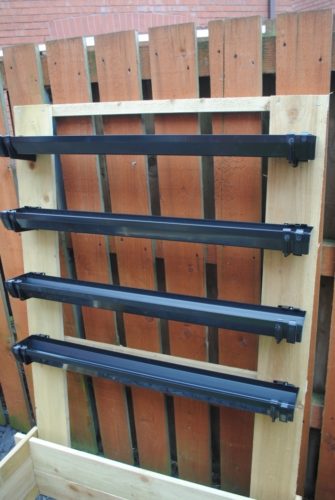
- For the frame, I used two lengths of 140x22mm/6x1” timber for the uprights and two lengths of 50x38mm/2x1.5” timber for the cross supports. I cut the uprights to 1500mm/59 inches each and the cross supports at 1100mm/43 inches each. For the uprights, measure where you want the brackets to be and screw them at equal distances apart. Do this for both uprights.
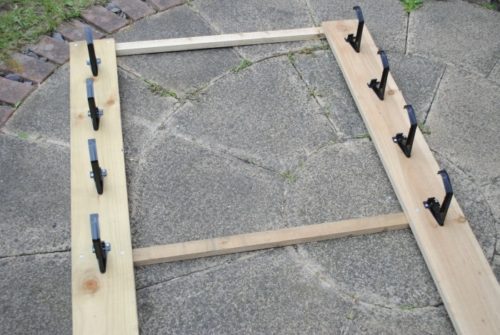
- Position the cross supports at the back of the uprights and screw into place to make the frame.
- Clip in the cutter lengths and the frame will be ready to be stood up. For extra support, I fixed the frame at the bottom of the uprights to a raised bed that we already had.
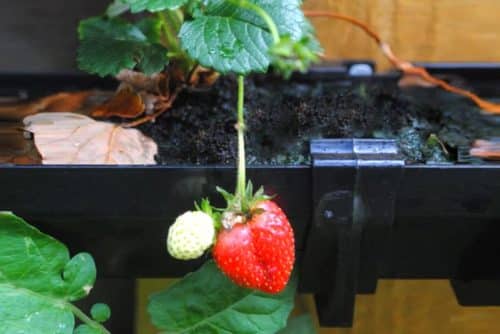
- The gutter can now be filled with compost (leave a small space below the rim for watering) and you can plant your strawberries. This type of growing gutter is also good for microgreens, pea shoots and herbs.
Notes
- Use a guttering with a deep profile.
- The frame is made from treated timber (it’s important the timber is treated as it will be resistant to the weather). This also makes the whole gutter system portable, should it need to be relocated.
- Follow the builders' rule: Measure twice, cut once.
- Don't forget stop-ends for your guttering or the soil/compost will fall out.
- You can stain or varnish the timber, but make sure it is completely dry before planting anything.